How to Configure Scheduler Settings for Automated Emails ?
Scheduler Settings: A Quick Setup Guide
To configure a mail scheduler in your system, follow these simple steps:
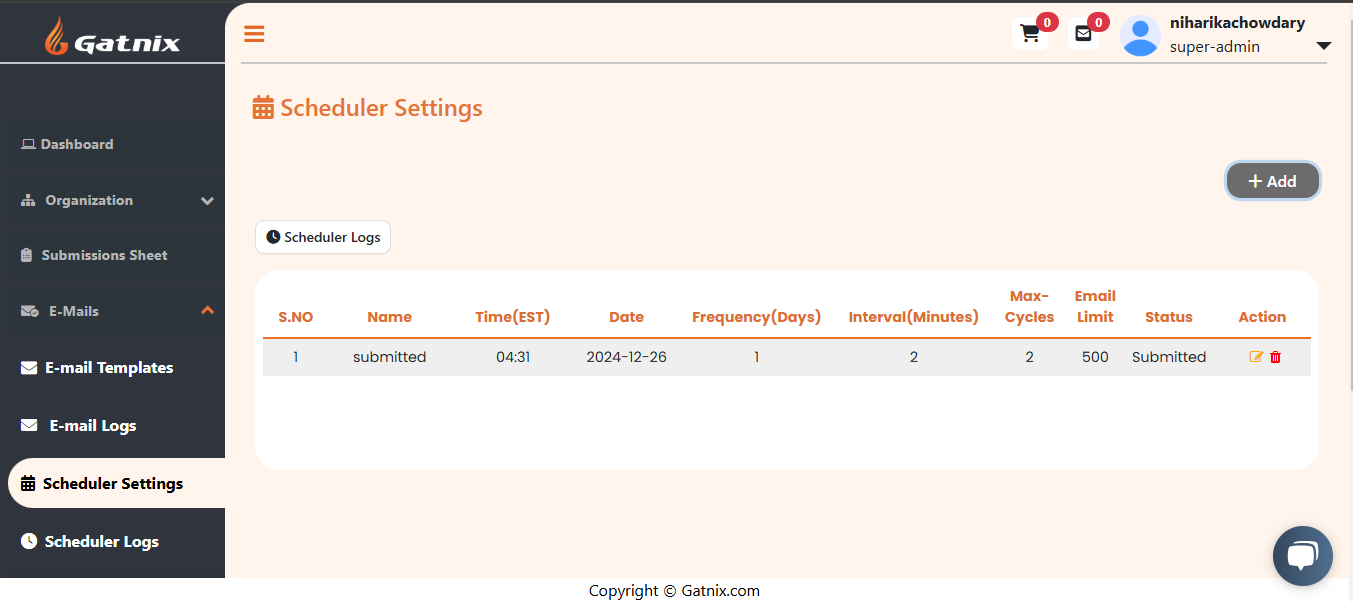
- Click on Scheduler Settings.
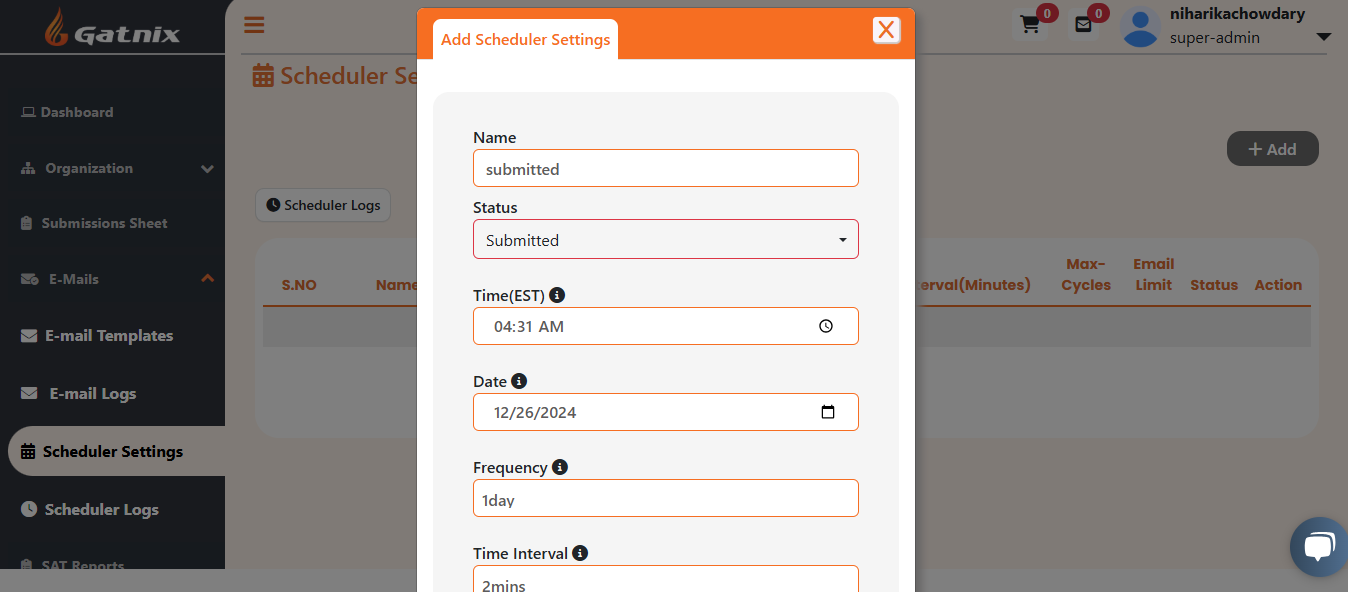
- Add a new mail scheduler by specifying the following details:
- Status: Choose whether the scheduler is active or inactive.
- Time in EST: Set the specific time for sending the email.
- Frequency Intervals: Define how often the email will be sent (e.g., daily, weekly).
- Max Cycles: Set the maximum number of times the scheduler will run.
- Max Mail Limit: Limit the number of emails sent within a specified time frame.
- Click Save to apply the settings and start the scheduling process.

Comments